| 일 | 월 | 화 | 수 | 목 | 금 | 토 |
|---|---|---|---|---|---|---|
| 1 | 2 | 3 | ||||
| 4 | 5 | 6 | 7 | 8 | 9 | 10 |
| 11 | 12 | 13 | 14 | 15 | 16 | 17 |
| 18 | 19 | 20 | 21 | 22 | 23 | 24 |
| 25 | 26 | 27 | 28 | 29 | 30 | 31 |
- ray tracing
- 레이 트레이싱
- AR Foundation Throwing
- Ray Tracing in One Weekend
- AR Throwing Game
- 렌더링
- AR 게임
- AR 던지기 게임
- 평면에 물체 던지기
- ar game
- Today
- Total
요리조리
폴리곤 메시 렌더링하기 (Rendering Polygon Meshes)_2 본문
레이와의 충돌(Intersection) 구현하기
오브젝트 파일을 읽어서 메시(mesh) 객체를 생성하였다면 이제 레이(ray)와 메시의 충돌을 구현해야 한다. 우선, 메시를 구성하는 각 삼각형들과 레이와의 충돌(intersection) 테스트를 함수로 구현한 후, 메시 전체(삼각형들의 모임)과 레이와의 충돌 테스트를 구현한다.
레이와 삼각형의 충돌 테스트 (Ray-triangle Intersection Test)
레이와 삼각형이 충돌하는지 확인하기 앞서 삼각형을 포함하는 무한한 평면(plane)과 레이가 충돌하는지의 여부부터 확인하자.
// edges
Vec3 e1 = v1- v0;  // v0v1
Vec3 e2 = v2- v0;  // v0v2

// 1. Check whether the ray is parallel to the plane
// Calculate determinant
Vec3 pvec = cross(ray.dir, e2);
double det = dot(e1, pvec);

if (det <= 0.000001f) return false;  // If the determinant is near zero, ray // plane
그 후, 평면과 레이가 만나는 지점이 삼각형 내부의 한 점인지 확인한다. 이때, Barycentric Coordinate을 이용하여 해당 여부를 알아낼 수 있다.
// 2. Do the intersection test using Barycentric coordinates (u, v, w)
// 2.1. Calculate U paramter and test bounds
double inv_det = 1.0f / det;  // inverse determinant
Vec3 tvec = ray.orig - v0;  // distance from vertex to ray origin
u = dot(tvec, pvec) * inv_det;  // U paramter

if (u < 0.0f || u > 1.0f ) return false;

// 2.2. Calculate V paramter and test bounds
Vec3 qvec = cross(tvec, e1);
v = dot(ray.dir, qvec) * inv_det;  // V paramter

if (v < 0.0f || u + v > 1.0f) return false;
이제 레이가 삼각형과 어느 시점(time)에 만나는지 계산한다. 또한 충돌 지점(intersection point)에서의 법선 벡터(normal vector)를 구하기 위해 사용되는 'Barycentric Coordinate'을 (레퍼런스를 매개변수로 넘겨받은 Vec3 변수 bary에) 저장한다.
// Ray intersects triangle
// 3. Record intersection time
t_temp = dot(e2, qvec) * inv_det;
*t = t_temp;
bary = Vec3{u, v, 1-u-v};
레이와 메시의 충돌 테스트 (Ray-mesh Intersection Test)
레이와 메시 전체의 충돌 테스트를 함수로 구현하자. 메시를 구성하는 삼각형들 전체에 대해서, 각 삼각형마다 순차적으로 레이와의 충돌 테스트를 진행하면 된다. 그리하여 레이와 가장 가까이에서 부딪친 지점의 정보를 기록하면 된다. 이때, 해당 함수는 삼각형들 중 하나라도 레이와 충돌하는 경우 true를 반환한다.
bool Mesh::hit(const Ray& ray, double min_t, HitRecord& rec)
{
/*
	// First intersect ray with AABB to quickly discard non-intersecting rays
	if (!m_boundingBox.hit(this.boundingBox(), ray))
	{
		return false;
	}
*/
	bool is_hit = false;

	rec.t = std::numeric_limits<double>::max();

	// Iterate over all triangles in the mesh
    int f_num = getNumFaces();
	for (int f = 0; f < f_num; f++)
	{
		const Vec3& v0 = getVertexPos(f, 0);
		const Vec3& v1 = getVertexPos(f, 1);
		const Vec3& v2 = getVertexPos(f, 2);

		// distance between origin and hit point
		double t_temp;
		// Output barycentric coordinates of the intersection point
		Vec3 bary;

        cout << "Face[" << f << "]" << endl;

		// Intersection test
		if (testRayTriangleHit(ray, &t_temp, bary, v0, v1, v2))  // Check if ray intersects the triangle
		{
            cout << "  t: " << t_temp << ", p: (" << ray.orig+t_temp*ray.dir << ")" << endl;  // debugging

            if(t_temp >= min_t && t_temp < rec.t)  // Update hit record only if hit earlier than the recorded one
            {
            rec.t = t_temp;   // intersection time
            rec.p = ray.orig + rec.t * ray.dir;  // intersection point
            rec.normal = getPointNorm(f, bary.x(), bary.y());  // normal at the intersection point
            rec.is_front_face = dot(ray.direction(), rec.normal) < 0;
            rec.mat_ptr = m_material;

            cout << "  *Update Hit Record* t: " << rec.t << ", p: (" << rec.p << ")" << endl;  // debugging

			is_hit = true;
            }
		}
        cout << endl;
	}
    return is_hit;
}
이제 메인 함수에서 오브젝트(월드)를 생성하고 이미지를 렌더링하는 부분을 작성해보자. 먼저, 앞서 구현한 loadObjFile 함수를 사용하여 피라미드 오브젝트를 로딩한다.
// meshes
Mesh mesh_pyramid;

// materials
auto metal = make_shared<Metal>(Color(0.5, 0.5, 0.5), 0.15);

// Load meshes
loadObjFile("pyramid.obj", mesh_pyramid);
mesh_pyramid.setMaterial(metal);
이제 렌더링을 준비하는 작업이다. 이미지의 퀄리티를 결정하는 값들을 세팅해주고 카메라 객체를 하나 생성한다. 렌더링된 이미지를 저장할 배열의 공간도 동적으로 할당해준다.
// Image
auto aspect_ratio = 16.0 / 9.0;
int image_width = 100;
int samples_per_pixel = 10;
const int max_depth = 10;

// Camera
Point3 lookfrom(13,2,3);
Point3 lookat(0,0,0);
Vec3 vup(0,1,0);
auto dist_to_focus = 10.0;
auto aperture = 0.1;
int image_height = static_cast<int>(image_width / aspect_ratio);
Camera cam(lookfrom, lookat, vup, 20, aspect_ratio, aperture, dist_to_focus, 0.0, 1.0);

// Rendered Image Array
out_image = (unsigned char *)malloc(sizeof(unsigned char) * image_width * image_height * 3);
다양한 이미지를 렌더링(rendering)하기
드디어 이미지를 렌더링한다. 이미지의 한 픽셀마다 설정한 샘플(sample) 개수만큼 레이를 쏘아서 해당 픽셀의 색깔을 결정한다.
void render(int image_height, int image_width, int samples_per_pixel, int depth, unsigned char* image, const Camera& cam, Mesh& mesh)
{
	// Render
	float r, g, b;
	for (int j = 0; j < image_height; ++j)
    {
	   	for (int i = 0; i < image_width; ++i)
        {
            int idx = (j * image_width + i) * 3;
            Color pixel_color(0, 0, 0);

            for (int s = 0; s < samples_per_pixel; ++s)
            {
                float u = (i + random_double()) / (image_width - 1);
                float v = ((image_height-j-1) + random_double()) / (image_height - 1);

                Ray cur_ray = cam.get_ray(u, v);
                pixel_color += computeRayColor(cur_ray, mesh, depth);

                r = pixel_color.x();
                g = pixel_color.y();
                b = pixel_color.z();

                // Antialiasing
                double scale = 1.0 / samples_per_pixel;
                r = sqrt(scale * r);
                g = sqrt(scale * g);
                b = sqrt(scale * b);
            }
            out_image[idx] = (256 * clamp(r, 0.0, 0.999));
            out_image[idx+1] = (256 * clamp(g, 0.0, 0.999));
            out_image[idx+2] = (256 * clamp(b, 0.0, 0.999));
		}
    }
}
// computeRayColor: calculates color of the current ray intersection point.
Color computeRayColor(const Ray& ray, Mesh& mesh, int depth)
{
HitRecord rec;
// Limit the number of child ray.
if (depth <= 0)
{
return Color(0, 0, 0); // If the ray hits objects more than 'depth' times, consider that no light approaches the current point.
}
// If the ray hits an object
if (mesh.hit(ray, 0.001, rec)) {
Ray ray_scattered;
Color attenuation;
if (rec.mat_ptr->scatter(ray, rec, attenuation, ray_scattered)) // Decide color of the current intersection point
{
return attenuation * computeRayColor(ray_scattered, mesh, depth-1);
}
return Color(0, 0, 0);
}
else
{
// If the ray hits no object: Background
Vec3 unit_direction = unit_vector(ray.direction());
float t = 0.5f * (unit_direction.y() + 1.0);
return (1.0f - t) * Color(1.0f, 1.0f, 1.0f) + t * Color(0.5f, 0.7f, 1.0f);
}// main()
render(image_height, image_width, samples_per_pixel, max_depth, out_image, cam, mesh_cow);이렇게 렌더링한 이미지의 결과는 아래와 같다.
어랏?! 피라미드 형태는 제대로 잡혀져 있는데 색깔이 온통 까만색이다. 레이가 물체와 충돌했을 때 child ray를 발생시키는 횟수, 즉 레이 레이를 추적하는 깊이인 "depth"를 1로 설정해서 그렇다! 즉, depth 크기를 50 정도로 올리면 이제 물체의 재질도 제대로 이미지에 표현될 것이다.
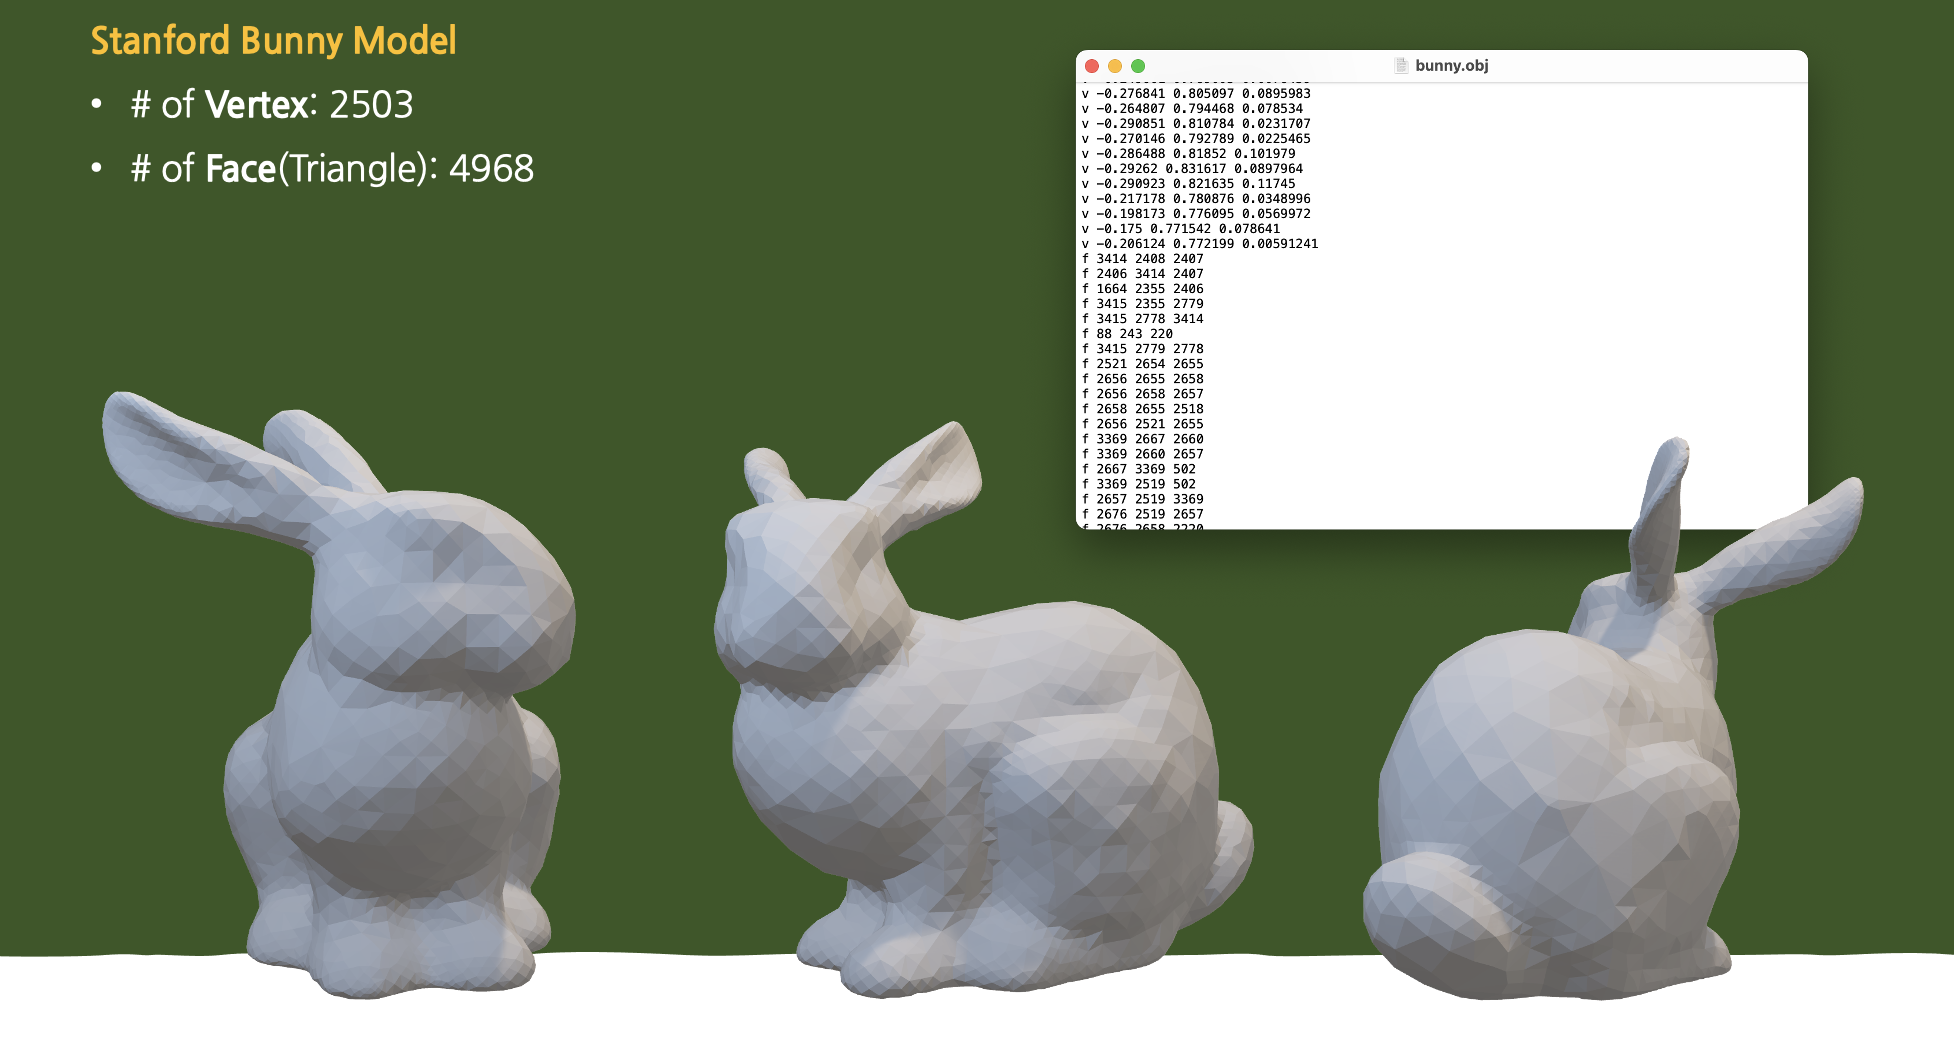
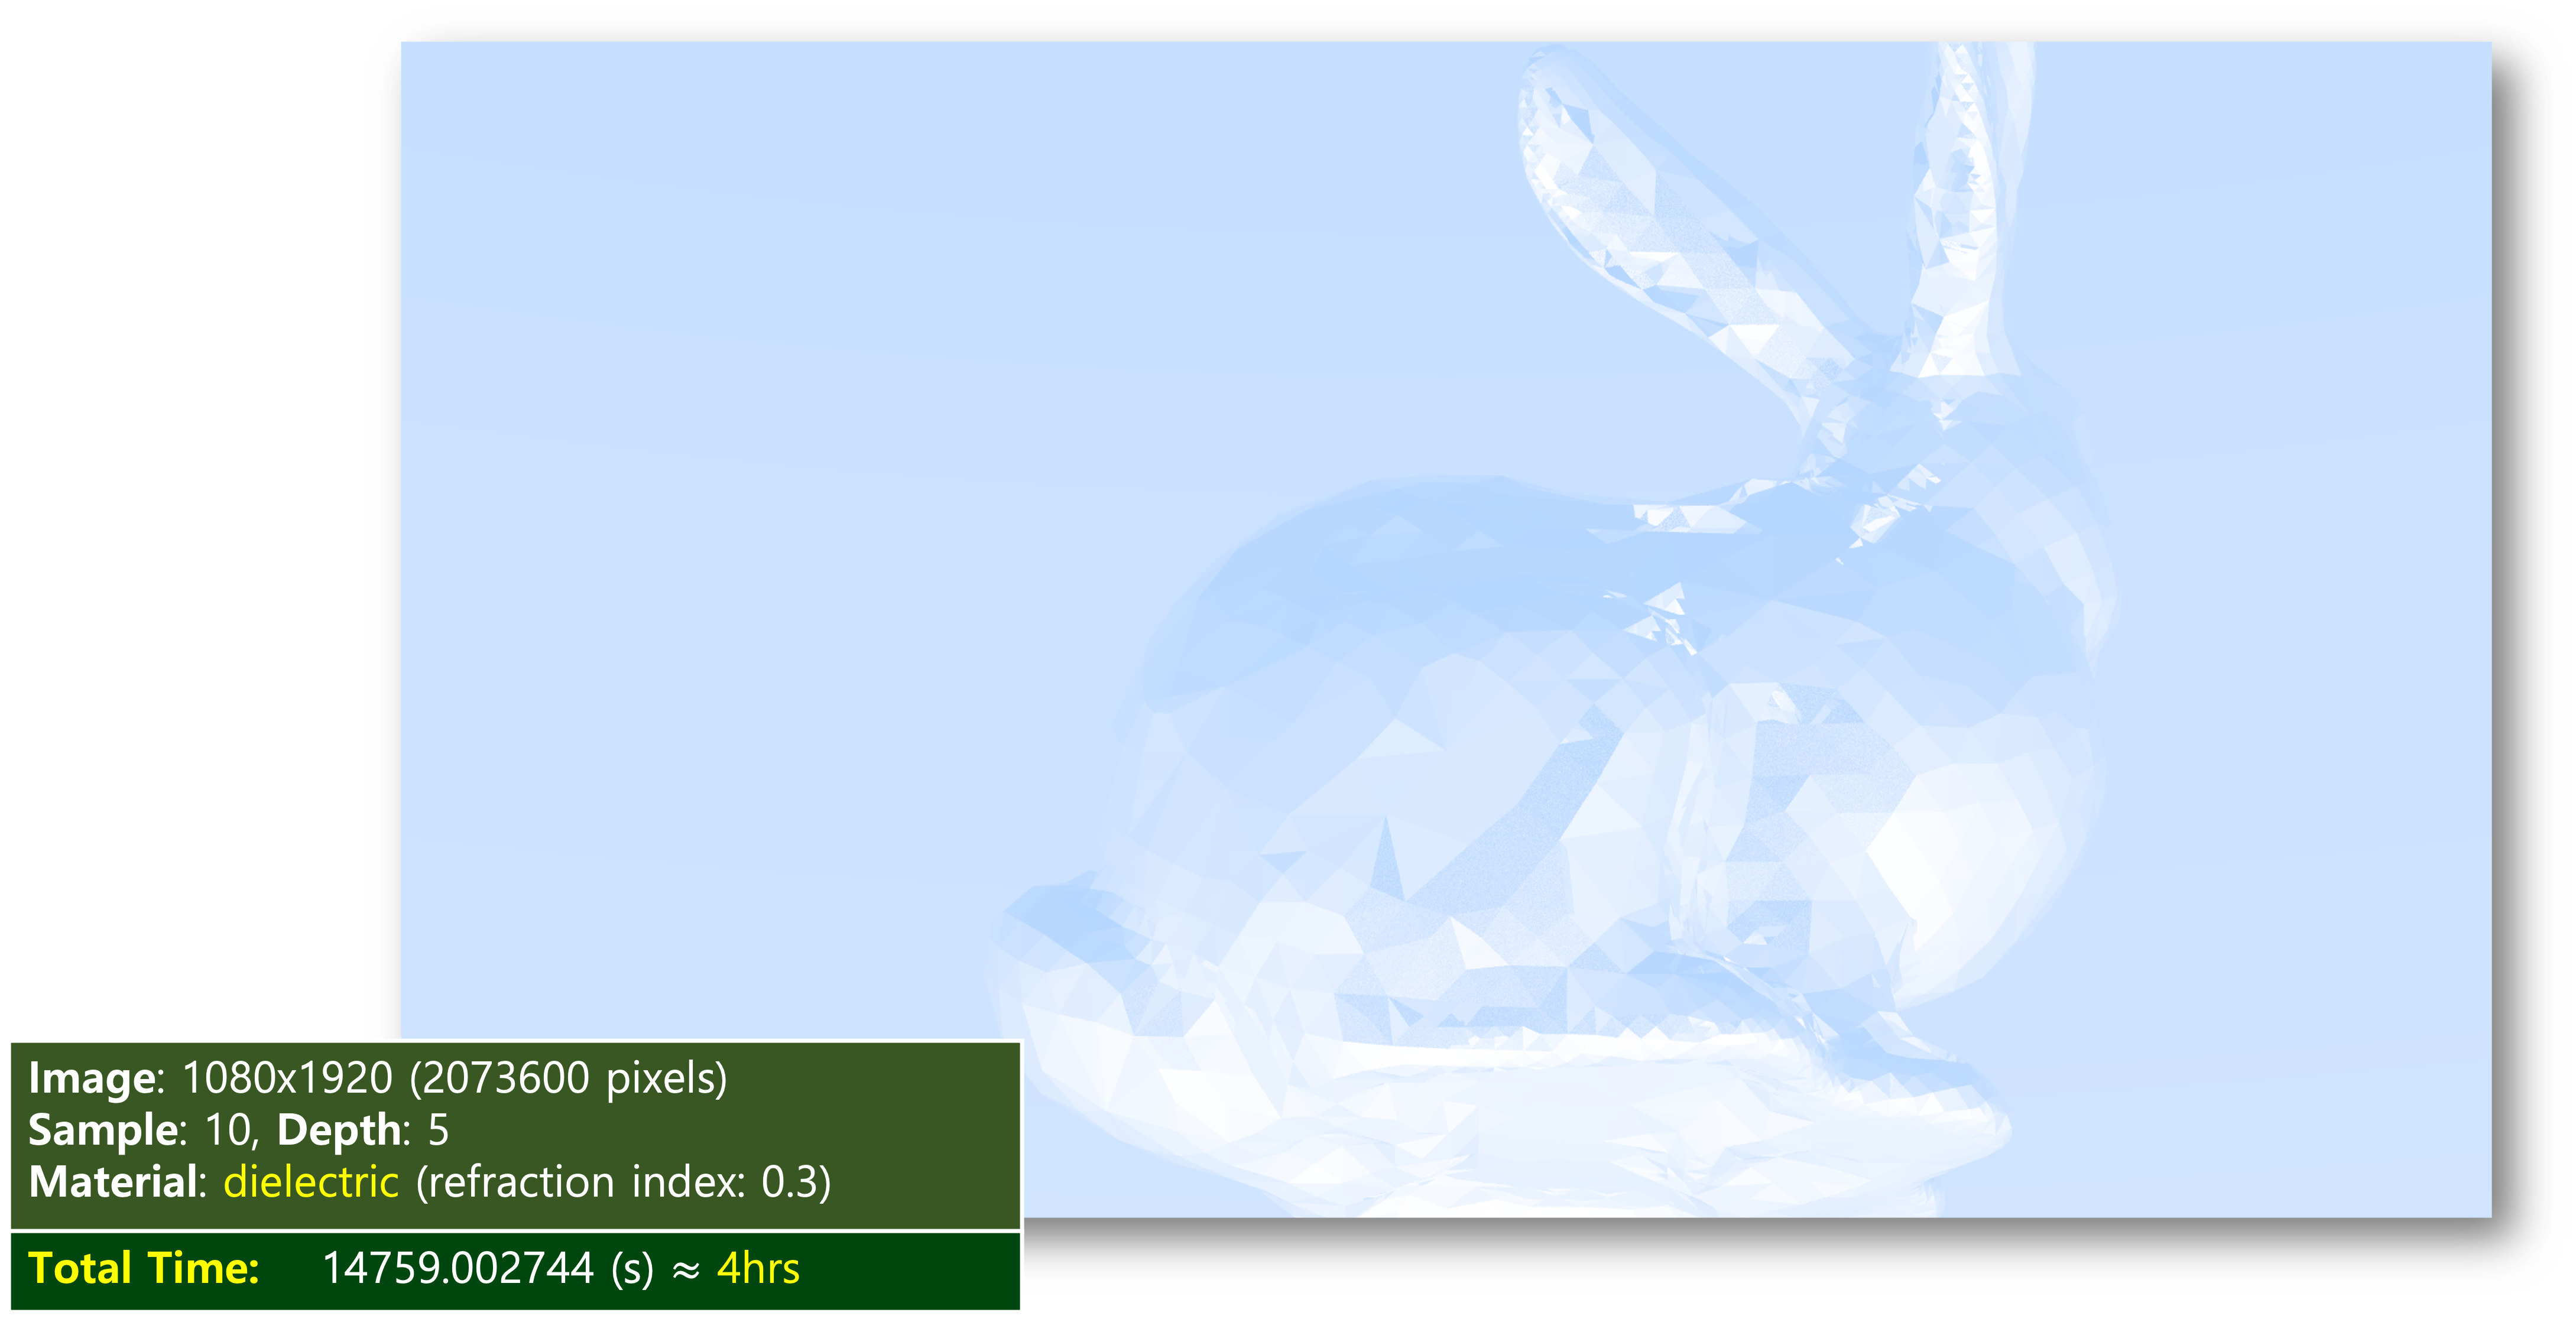
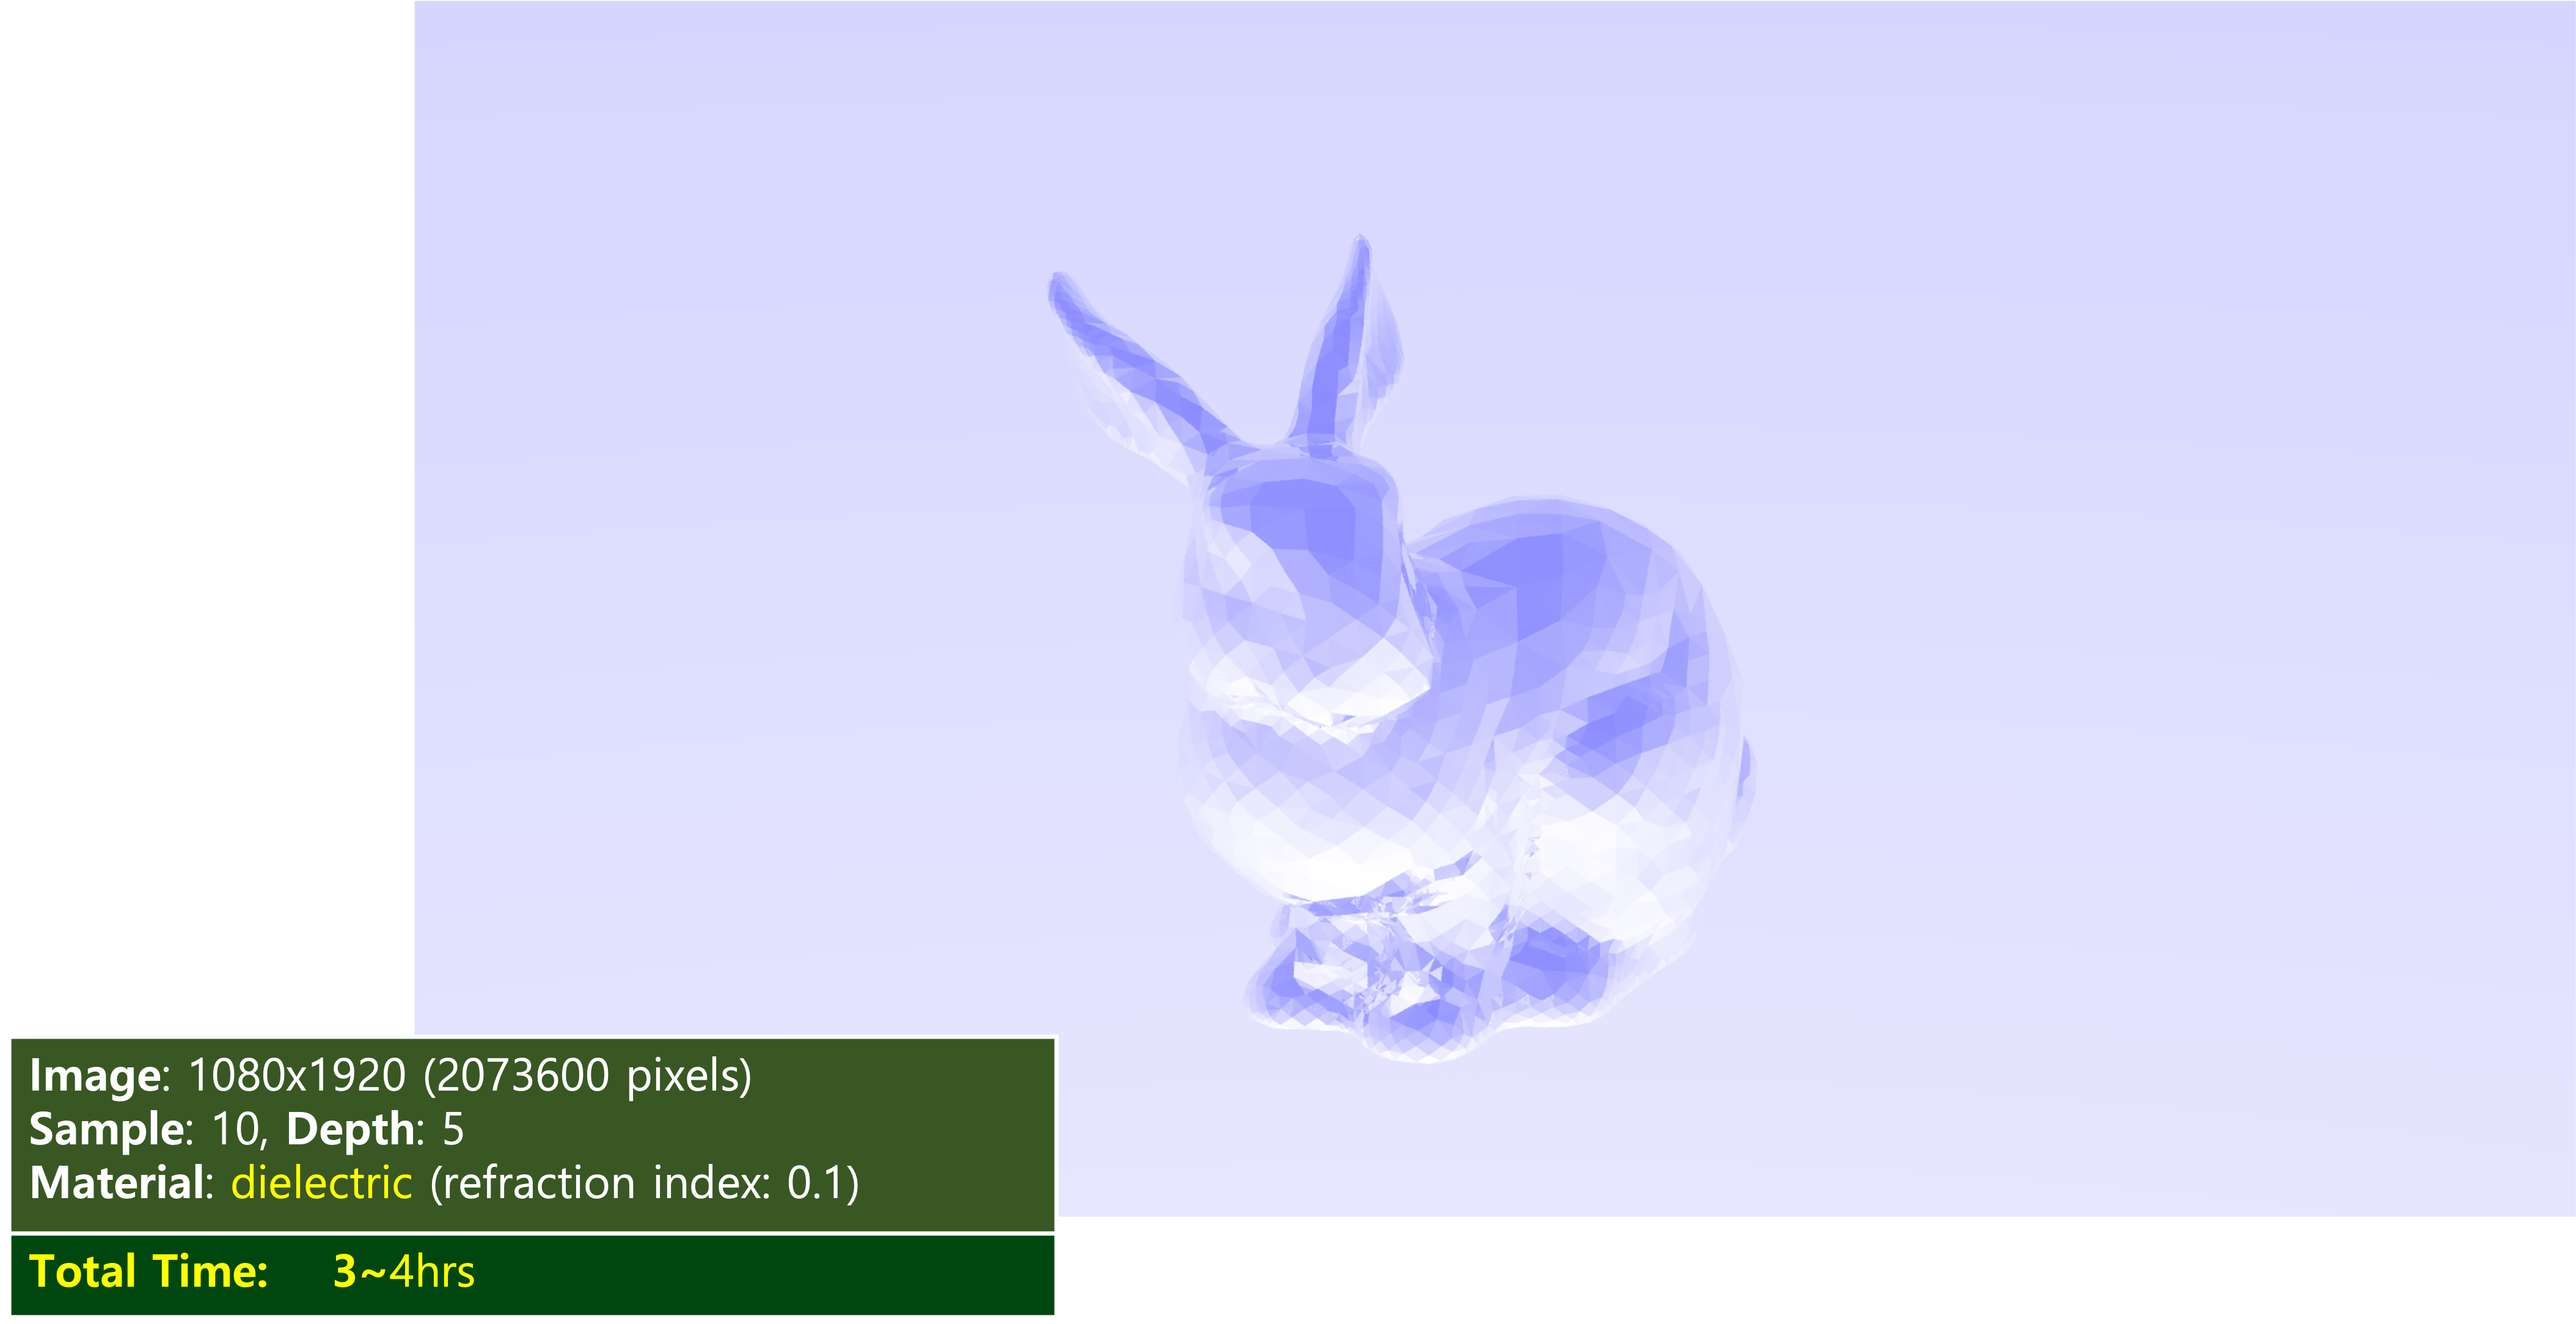
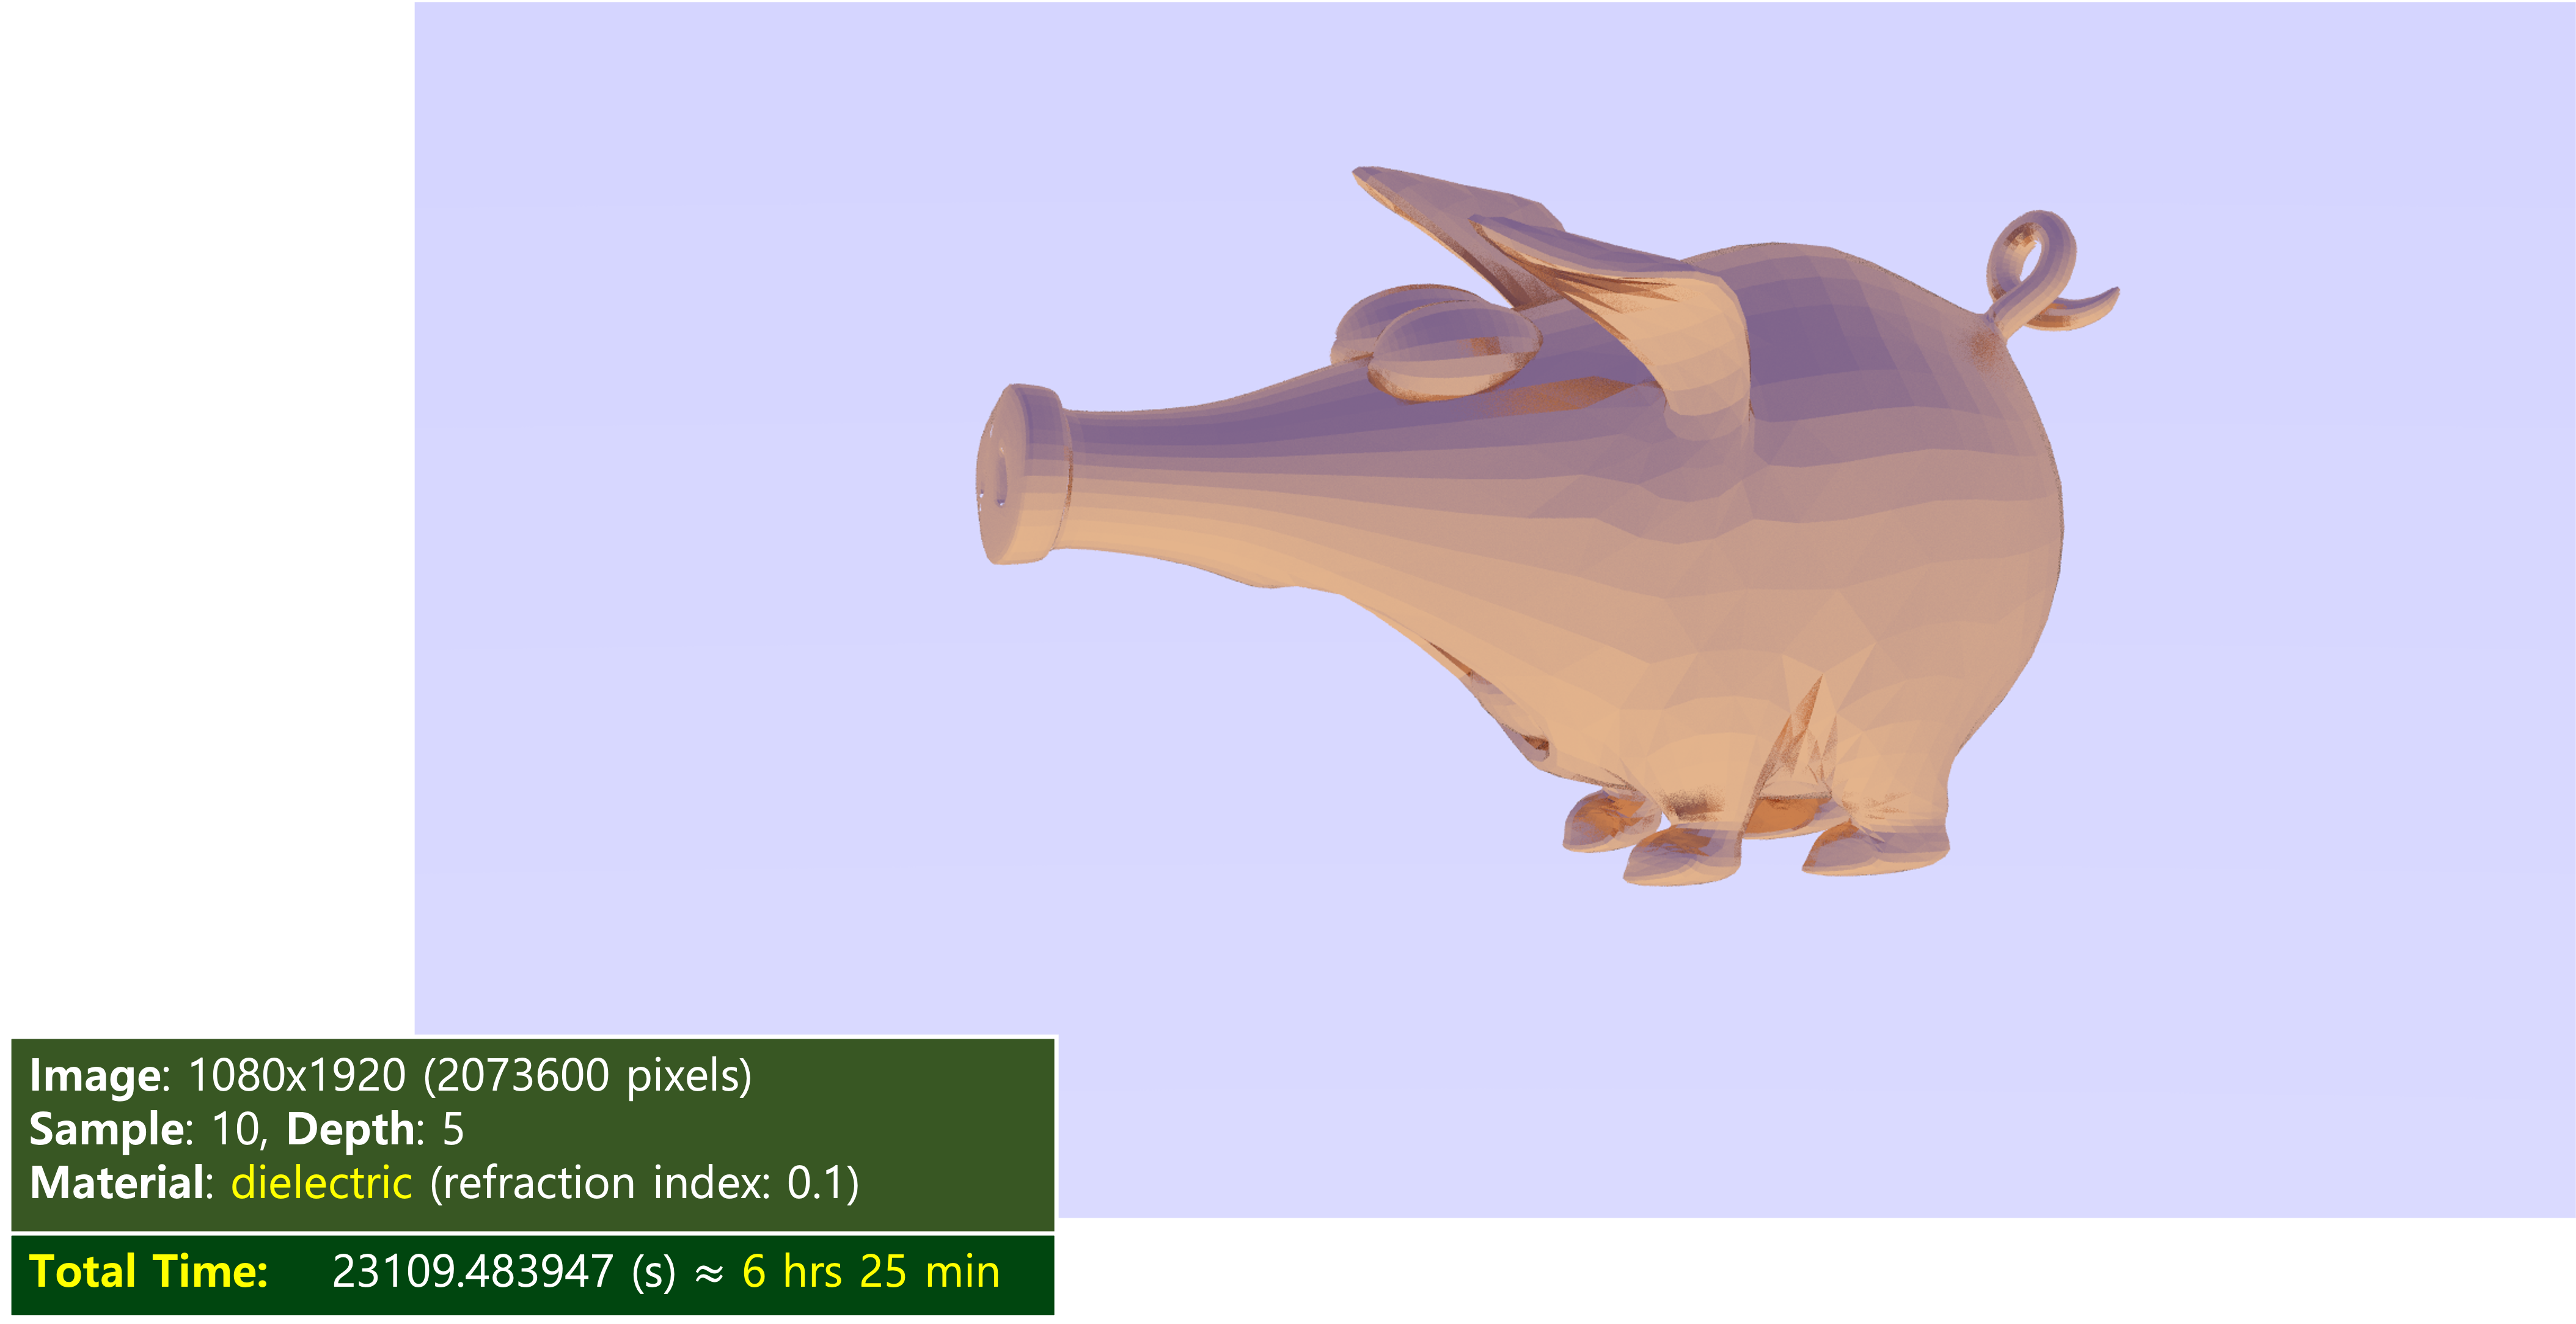
복잡한 모델들의 렌더링 (Rendering Complex Models)
복잡한 모델들을 렌더링해보자. 레이 트레이싱에서 많이 사용하는 '스탠포드 토끼(Stanford Bunny)' 모델과, Keenan's 3D Model Repository에서 다운받은 돼지 모델을 렌더링에 사용하였다. (이제 보니, 스탠포드 토끼보다는 face와 vertex 개수가 좀 더 적은, 비교적 간단한 토끼 모델인 것 같다... 소위 짝퉁...? ㅎㅁㅎ)

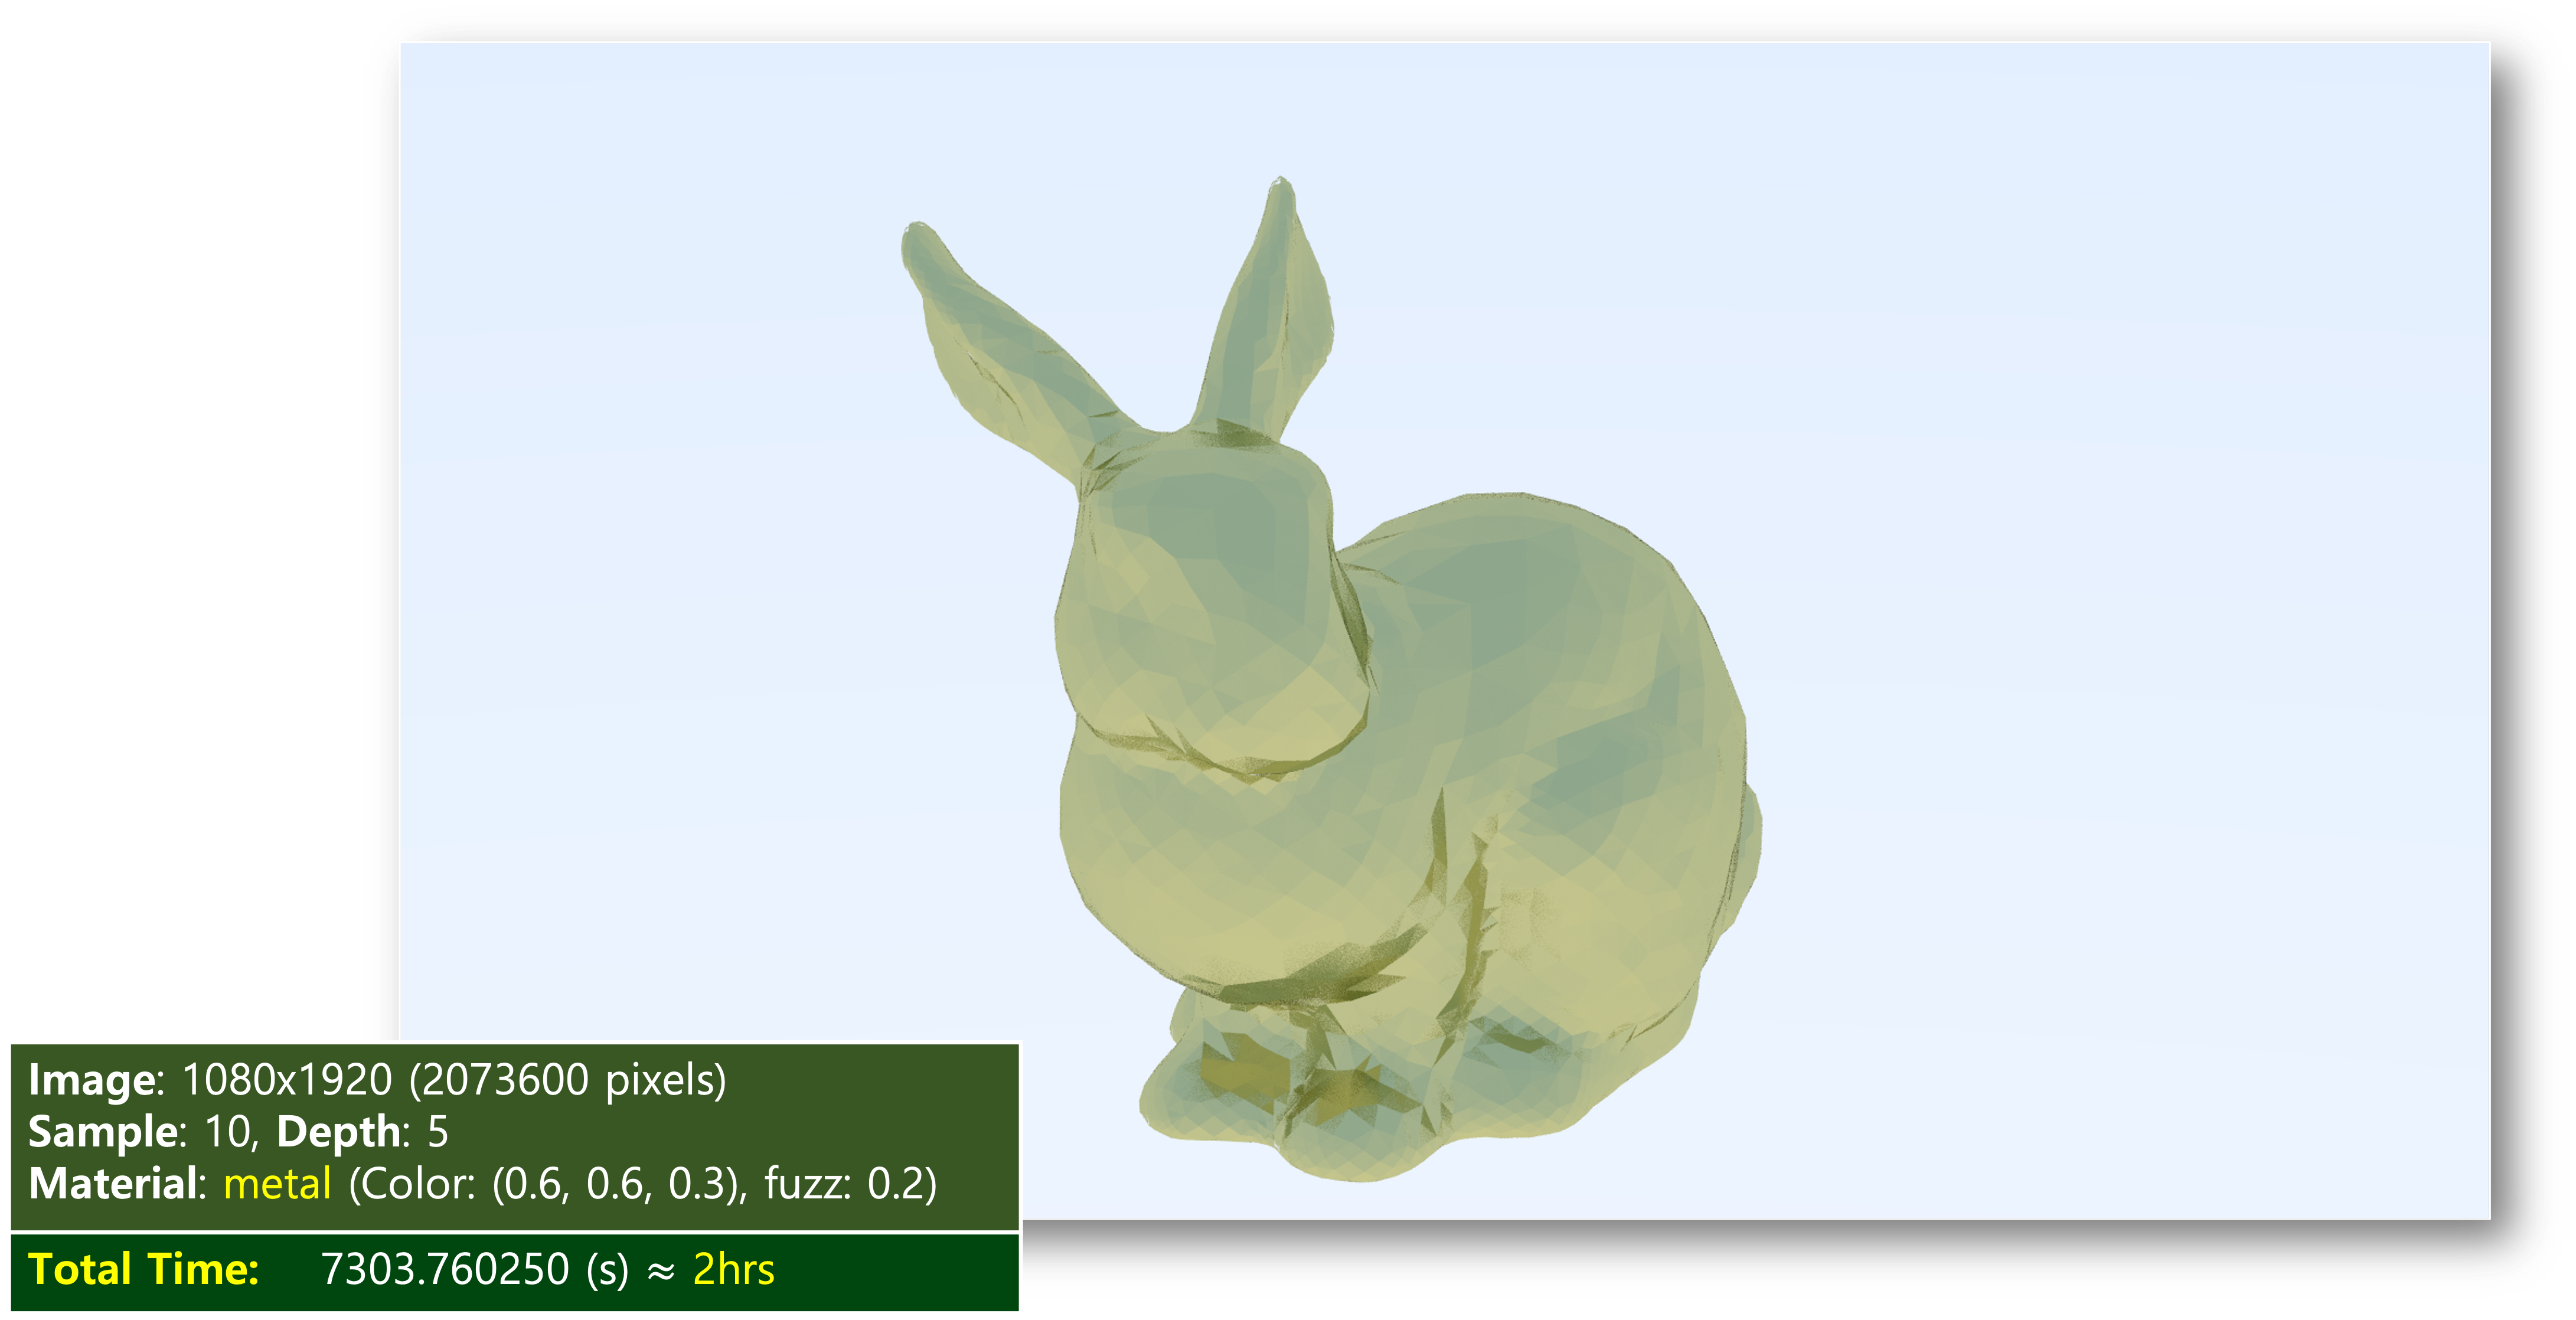
렌더링 결과
이미지의 해상도와 샘플(sample) 개수, depth 값을 동일하게 하여 렌더링하는 데 걸린 시간을 측정하였다. (사실, 중간 중간에 잠시 컴퓨터가 멈추는 바람에 실제보다 더 길게 측정이 되었다...)
'연구실 인턴 > Ray Tracing' 카테고리의 다른 글
| Bounding Volume Hierarchy (BVH)로 렌더링 가속화하기 (0) | 2023.02.13 |
|---|---|
| 폴리곤 메시 렌더링하기 (Rendering Polygon Meshes)_1 (0) | 2023.01.26 |

